
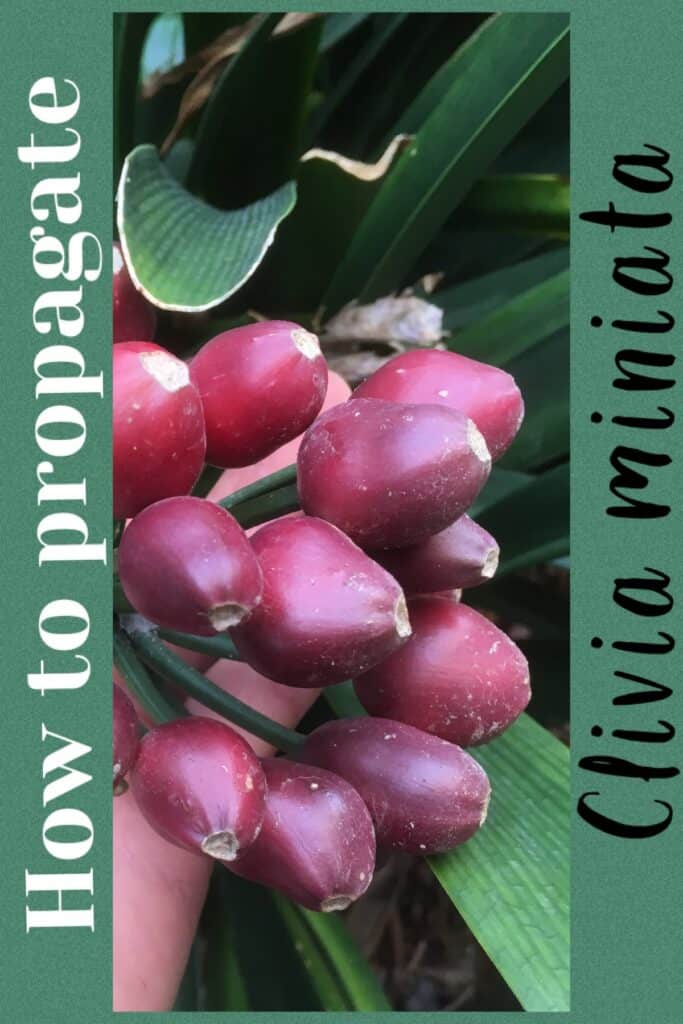
How to propagate Clivia
This article will show how we propagate clivia’s. We use the seeds. We have approximately 15 well established clivia plants in our garden and each year we collect the seed, which we use to produce over 400 new plants.
This is very easy to do and here we will show you how. All thats required is some patience as clivia’s are very slow growing but the reward so worth the wait.
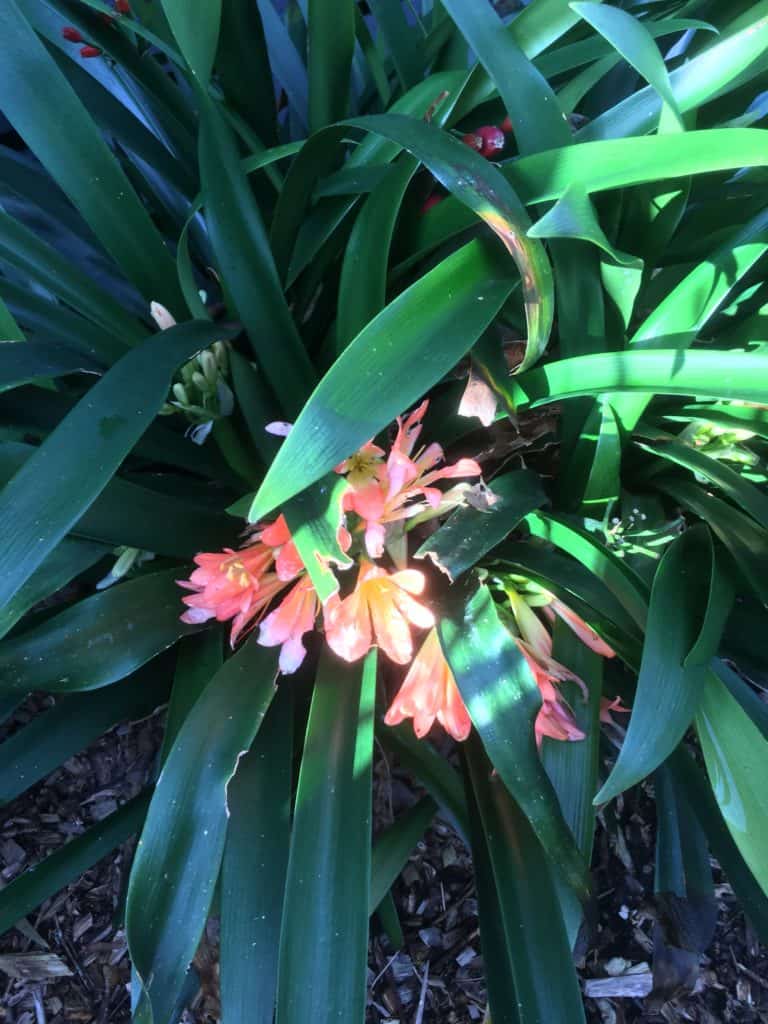
Clivias would have to be one of my favourite plants! They can tolerate very deep shade, but not only that they can thrive. Also they are super hardy able to withstand very dry conditions.
These amazing plants remain a vibrant green all year round and the trumpet flowers in large clusters are just spectacular!
I love to mass plant them in very shady areas where not much else will grow. They are available in a wide range of colours these days.
Collecting berries
Clivia’s main flowering time is at the very end of winter into early spring. These flowers will become berries over time.
It usually takes about 9 months from the flowers finishing for the berries to be ripe. This sounds like a long time and it is, but we just don’t cut off any flower stems on the plants. The flower stems blend into the plant quite well so they do not look unsightly. And once the berries start to form and ripen they are quite striking against the lush green foliage.
Whilst clivia’s main flowering is at the end of winter into spring they will sporadically flower throughout the year though not in mass. Because of this it is usually possible too find ripe seeds almost any time of year, although late autumn early winter is when the harvest is most bountiful.
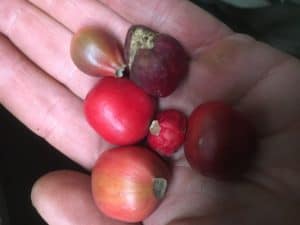
Collect the berries when they are a nice vibrant colour, avoid green berries these are not ready. The Berries will vary in colour depending on the plant, for example orange flowers tend to produce red berries. Whilst cream and yellow flowers tend to produce yellow berries.
I should note that berry colour does not guarantee what colour the plant will flower as. Because seeds are cross pollinated by bees and insects there will be genetic variations. This doesn’t bother me as any of the different colour variations look amazing against the vibrant scrappy leaves.
So once the berries are ready to be collected we like to store them in a small cardboard box or laid out on newspaper. We like to dry the berries for about 2-3 weeks. This makes them much easier to peel. Do not store them in a plastic bag as this won’t allow the berries to breath and may lead to the berries rotting.
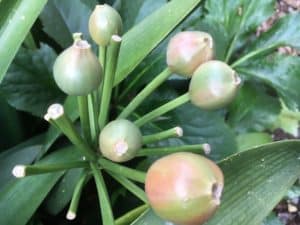
Civia berries starting to ripen
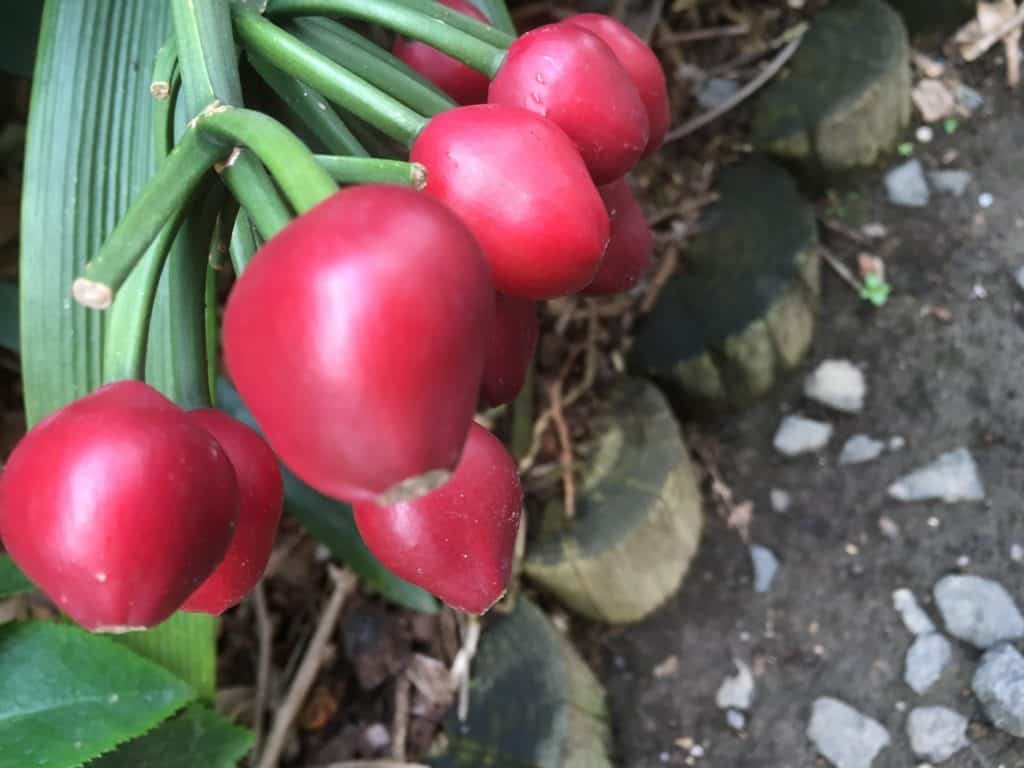
Clivia berries ready for harvest
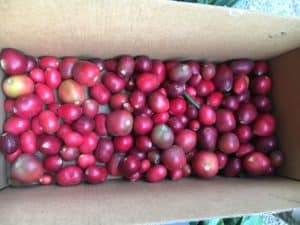
Harvested clivia berries
Removing the seeds from the berries
We find that by peeling the berries to reveal the seeds speeds up the germination times and increases the success rates of germination.
You’ll find that there is quite often multiple seeds within a berry. I think my personal record was a berry that contained 13 seeds.
The berry has quite a lot of pulp and if you peel them fresh its quite fleshy and sticky. The seeds are encased in a film that needs to be broken to extract the seed. I find that if the seeds are fresh this becomes quite challenging as my fingers (covered in pulp) just slip and slide over this film. That is why we dry the seeds for 2-3 weeks.
We do like to make sure there is still some moisture within the seed, if left to long the outer berry shell becomes almost impenetrable. A good guide is that once the berry skin begins to shrivel it’s a good time to start peeling.
Clivia berries at various stages
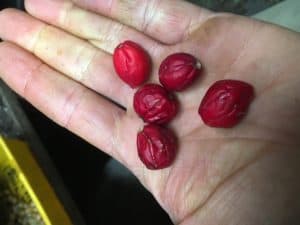
Clivia berries ready for peeling
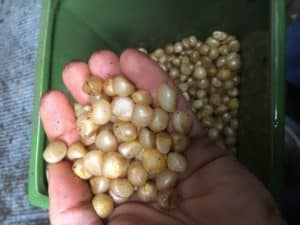
Clivia seeds
Sowing the seed & germination
Once all your berries have been peeled they can be sowed. We always sow our seeds into a used vegetable crate. If your only sowing a few i would sow directly into small pots. I like to allow a depth of 12cm (4″). The roots on clivias can be quite extensive.
Simply fill the crate with good quality potting mix (not all the way to the top) and evenly spread the seeds over the top. The general rule with seeds is that you only want to cover them lightly. A clivia seed is about 1cm (1/4 “) and should therefore only be covered with 1cm(1/4”) of potting mix.
If you are sowing into a pot. Fill up the pot with potting mix then gently push the seed into the mix just below the surface.
After the seeds have been covered water them and store in a shaded area. Clivia’s love shade! direct sunlight as they emerge from below the soil may cause them to burn and die.
If your shaded area is in a green house or under a porch remember to keep the potting mix moist whilst you wait for the seeds to germinate. Avoid over watering, the seeds will rot if kept wet. Clivia’s are best kept on the drier side.
Germination is fairly quick. Small green leaves should start emerging within 3 months.
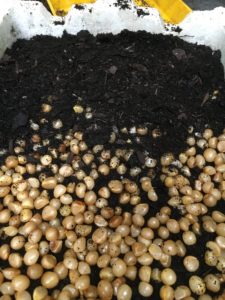
Sowing clivia seeds

Clivia seedlings
Potting seedlings
Whilst the seedlings will start to sprout within 3 months i prefer to let them mature a while longer before potting. Generally i wait between 6 & 9 moths before potting, these particular seedlings in this article i waited 12 months. Clivia’s do not mind being pot bound.
If you wait 12 months like i did these seedlings are strong enough to be planted into the garden.
Generally we wait about 6 months and pot them into 100mm(4″) pots. Again use a good quality potting mix. When removing the clivia’s from the crate it’s important to avoid cutting or breaking the roots.
These cuts and breaks can sometimes allow root rot to take hold. I find this not a problem when dividing long established plants, But young seedlings care should be taken. We find it’s best to gently shake the seedlings apart rather than pulling them.
When we plant into pots we use a slow release fertiliser to provide a steady steam of nutrients to the young plants. If planting into the garden if possible provide some nice compost. Whether planting into the garden or pots we always make their first drink a seasol solution (seaweed fertiliser) we find this reduces any plant shock and provides our young seedlings a great start.
That’s about all there is too it. Blow is a short youtube video showing the above steps.
We hope this has been helpful and would love it if you subscribed to our website. Happy planting:)
Clivia Propagation Video
This video is about how to propagate clivic miniata. In this video we used seeds we collected to produce hundreds of new clivia plants.
CLICK HERE TO SEE OTHER PLANTS WE PROPAGATE
Propagation Kit
We have also put together a resource page that contains links to the products we use or similar. If you want to check that out click the link.
Clivia miniata information & care
Clivia miniata is a evergreen perennial. It forms clumps of very dark green strappy leaves. In winter into spring it produces clusters of orange trumpet like flowers on strong sturdy stems. Over time the stems will hold the seed pods, which start off green and once ready will turn an orange-red.
Bush lily is a great choice for very shady areas of any garden. Can be grown in pots. Adds a vibrant splash of colour when in flower, while the foliage and compact clumping habit provide year round value.
Really should be planted in shade but will tolerate part shade provided there is no afternoon sun exposure. A very hardy plant its great for under larger trees as it can easily adapt to dry conditions. Frosts will really damage the leaves so plant under evergreen trees. It contains small amounts of lycorine, making it poisonous if eaten.
Cultural notes
Botanical name: Clivia miniata
Common name: Bush lily, Kaffir lily, Natal lily
Family: Amaryllidaceae
Native to: Southern Africa
Flowers: Winter-Spring
Position: Shade
Height: 50cm
Width: 50cm