Dividing Bearded Iris
This article will show the methods and techniques we use when dividing our bearded iris. Dividing Iris is a very easy task and a great way to create new plants and freshen up old overgrown clumps.
This task is best performed in late autumn or early winter, that way the new plants have a good chance at becoming established in pots or the ground and will be strong enough to withstand the weight of flowers in spring.
We use plants from our nursery. But it’s most common to dig up an existing clump. One large clump can potentially provide 50-100 individual plants if desired.
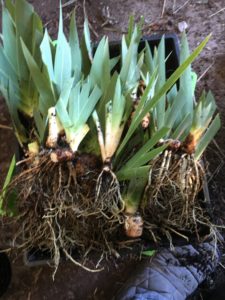
Remove soil
Remove as much soil from the roots as possible. This will allow you to see the roots clearly and how the rhizome is forming new plants.
As we are removing potted plants the potting mix falls away quite easily, especially if you allow the pots to dry out before hand.
When digging up an existing clump in the garden sometimes we need to use a hose to wash the roots clean.
Removing all or most of the soil also allows the new plants a truly fresh start as it also removes any weed seed and soil pathogens that may be present.
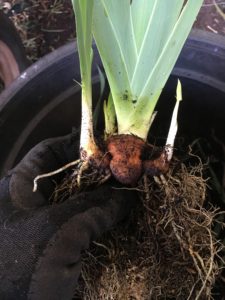
Removing the soil
Divide
Now that the structure of the individual plants is clearly visible you can easily begin breaking apart individual plants. The majority can simply be snapped off using your hands.
Occasionally you will need to cut out individual plants. This is usually only necessary when the foliage is emerging from the main rhizome but that plant hasn’t developed it’s own rhizome.
Simply cut out some of the main rhizome with a small amount of roots attached. This will be sufficient to establish the new plant.
We personally try to avoid cutting the main rhizome in this manner, as this can be a week spot for rot to attack the iris. We will however quite often cut the rhizome to make it shorter (and thus fit inside a pot).
The best way to describe the difference is that when we cut the iris to make it fit into a pot it’s quite a distance back from the foliage. But when cutting a wedge out of the main rhizome it tends to be much closer to the foliage.
So we tend to only cut into the main rhizome near the foliage when we are really short on numbers of new plants. It’s safer to stick to the plants that easily break apart under simple hand pressure, the new plants forking off will form their own rhizome over the coming season.
Whenever we cut the rhizome if necessary, we will allow the cut to dry out for a few days. This seems to greatly reduce any rot problems.
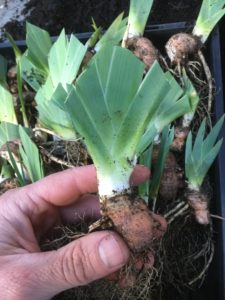
Whilst your dividing your iris you will notice lots of smaller rhizomes with roots but no foliage. These are usually an inch or more behind the main area of foliage. All of these tiny rhizomes are viable new plants. These also break off very easily.
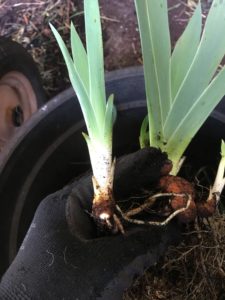
Separating easily by hand
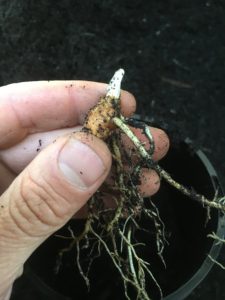
Small iris rhizome
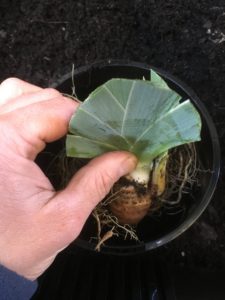
Reduce foliage
Whilst dividing the iris we tend to cut the foliage in half (on the rhizomes that are quite large and have more than 3 leaves). We do this for two reasons.
The first being, that sometimes when dividing plants the stress on losing a large part of their root system can stress the plant. A stressed plant will kill off foliage it cannot support with its roots, this dying foliage can look unsightly. I personally don’t like seeing new fresh plants looking sad.
This is not really a problem with bearded iris as the plant has stored quite a lot of nutrients and energy in the rhizome. This is what allows plants like iris to be shipped through the mail without soil when they are dormant.
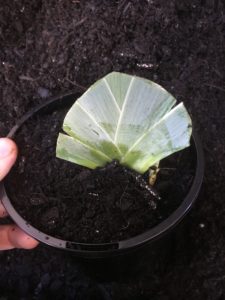
The second and main reason we like to cut the foliage in half is that the rhizome on bearded iris are quite susceptible to rot and for this reason you should plant them quite shallow, and if the foliage isn’t cut down, the wind will act as a sail and pull the shallow potted iris out of the ground or pot.
Again this will not immediately kill the iris as it can live quite sometime out of the ground, but the quicker we get those roots anchoring into the ground and sucking up all the nutrients the quicker we can be rewarded with their striking flowers.
Barerooted iris
Foliage cut back
Potting/Planting
If like us, you’re planting your new iris into pots, it’s important to use a good quality potting mix. Not only will a good quality potting mix contain loads of organic materials and minerals, it should be well draining.
Remember bearded iris are susceptible to rot! Well draining soil is important. It’s also important not to plant the iris to deep. We only cover the rhizome with approximately an inch of soil.
Another tip if planting into the pot is to position the end of the rhizome (the part without foliage) against the wall of the pot. This is done because as the plant grows, the rhizome becomes longer, so we need to give it room to grow.
If planting direct into the garden, select a position that has full sun, as this will encourage more prolific flowering. Do not plant iris in an area of the garden that has an automated sprinkler system. Bearded iris are incredibly hardy but can be killed by kindness!
Also, where bearded iris are planted, don’t over mulch. As this can trap in too much moisture.
Oh, remember all those little rhizomes we broke off? Those we plant into pots usually 3 or 4 per 14cm (6″) pot. These will quickly grow into bigger iris that can be planted into the garden the following season.
Dividing iris is really easy and freshens up overgrown clumps, and creates loads of new plants which you can share, or like us, sell. Hope this was helpful.
We would love it if you’d subscribe. Happy planting.
Below is a short video showing the above steps in a more visual way.
CLICK HERE TO SEE OTHER PLANTS WE PROPAGATE
Potting Bearded Iris
Only lightly cover rhizome
Propagation Kit
We have also put together a resource page that contains links to the products we use or similar. If you want to check that out click the link.
Dividing Bearded Iris Video
Hopefully this little video helps you if you’re unsure about how to do it.
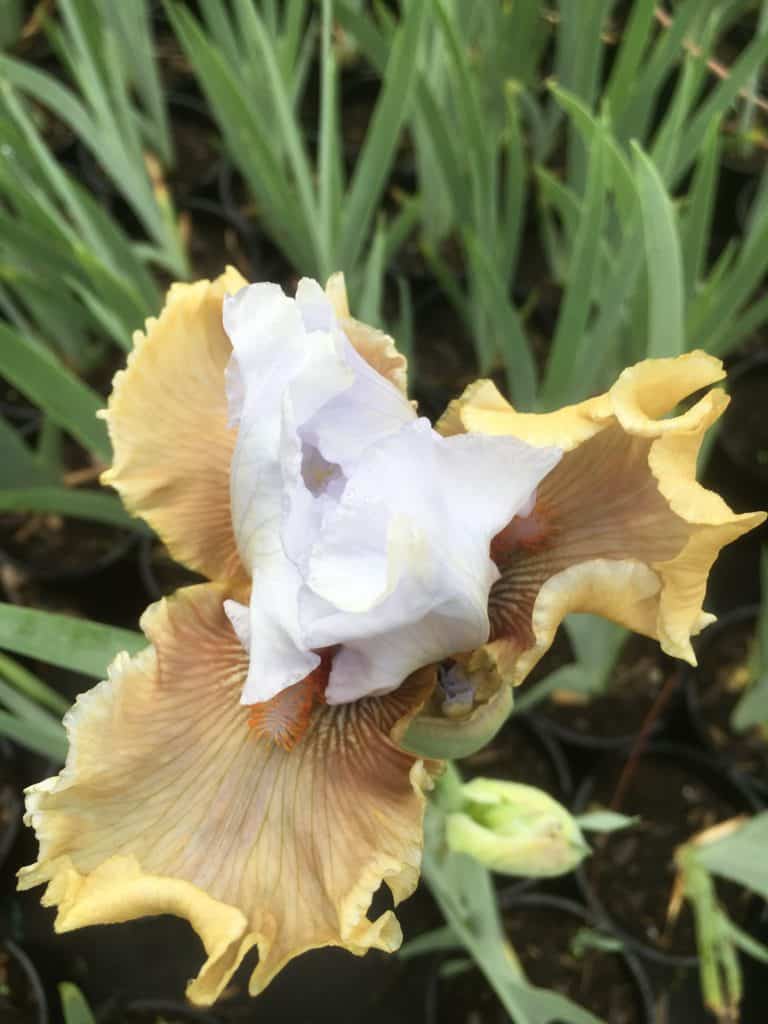
Iris germanica- Bearded iris
Iris germanica- Bearded iris is a evergreen perennial. It spreads by creeping rhizomes which form large clumps over time. In spring it produces stunning large flowers on tall stalks. There are numerous colours available. We grow a dwarf purple variety. A large pale blue type, and a large oyster coloured variety.
Berded iris are a must have in any cottage styled or flower gardens.
Requires well draining soil. Position plants in full sun to get great flower production. Avoid over watering as the rhizomes are susceptible to rot. Do not cover plants with mulch as this will also encourage rot. Plants can be divided and replanted after flowering.
Cultural notes
Botanical name: Iris germanica
Common name: Bearded iris
Family: Iridaceae
Native to: Southern Europe
Flowers: Spring
Position: Full sun
Height: 50cm-1.3m
Width: 50cm-1m